
Just remember, education is the doorway to happiness. To receive a good education, you will need good teachers. Also, you will need to be up on the latest tech.
- Choose your backsplash tiles. Select the tile material, size, and color that best fits your kitchen design and personal preferences.
- Measure the backsplash area. Accurately calculate the width and height of the space behind the countertops where you’ll be installing the tile.
- Calculate the amount of tile needed. Multiply the width by the height of the measured area to find out how many square feet you’ll need to cover, then add an extra 10% for potential breakage or cutting mistakes.
- Gather materials and tools. Acquire tile adhesive, grout, spacers, a notched trowel, a level, a tile cutter (if necessary), a sponge, and a bucket.
- Clean and prepare the surface. Remove any grease or dirt from the wall and ensure it is smooth, dry, and free of debris.
- Create a layout plan and starting point. Dry lay your tiles on the countertop or floor to determine the pattern you prefer. Mark this layout on a ledger board with pencil lines; this will serve as your reference point for installation.
- Begin by mixing your tile adhesive according to manufacturer’s instructions.
- Apply a small section of adhesive onto the wall with a notched trowel at an angle consistent with your chosen pattern (often 45 degrees). Use enough pressure to ensure the adhesive sticks well to both surfaces—tile and wall.
- Press each tile firmly into place on top of the adhesive within your marked layout lines, applying even pressure across all sides.
- Install spacer clips between tiles to maintain even spacing between them and avoid misalignment as they set in place.
- Continue installing tiles along your layout plan until you’ve covered all desired areas of your backsplash.
- Allow at least 24 hours for the adhesive to cure before removing spacer clips and applying grout.
- Mix your grout in a bucket according to manufacturer’s instructions and apply it to the tiles using a rubber float, working diagonally across the tile surface to fully fill the gaps between each tile.
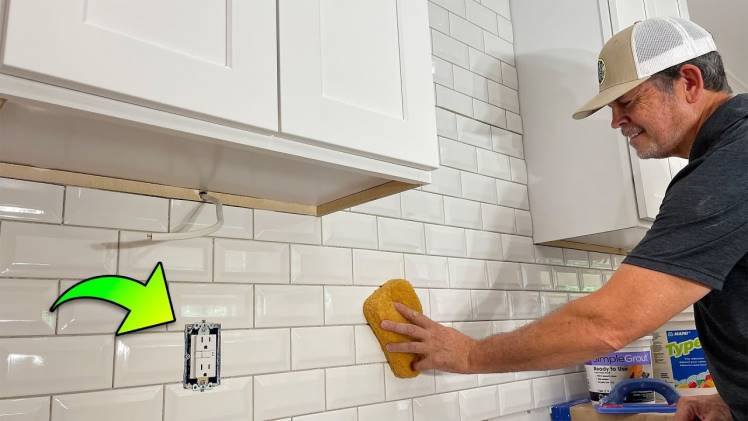
- Wipe away any excess grout with a damp sponge, taking care not to disturb the grout lines or remove too much material from them.
- Allow the grout to cure for at least 24 hours before sealing it (if applicable) and cleaning your new tiled backsplash with a mild soap solution.
Your beautifully tiled backsplash is now complete – a fresh, stunning addition to your kitchen space!